


Here are a few photos of a custom build I just completed
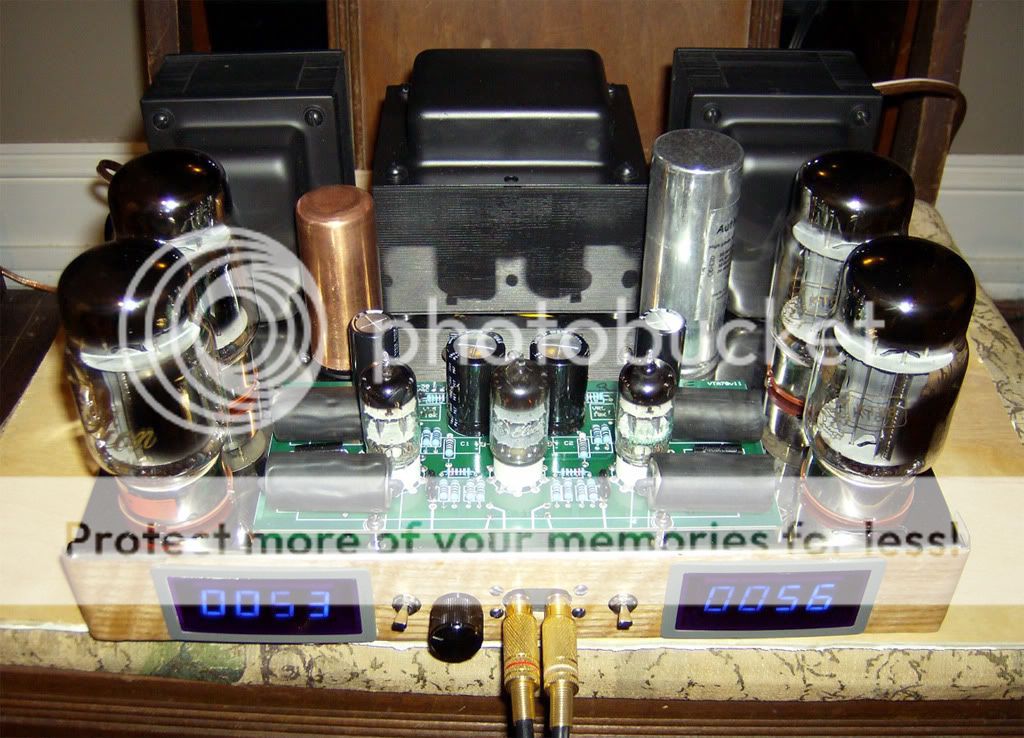
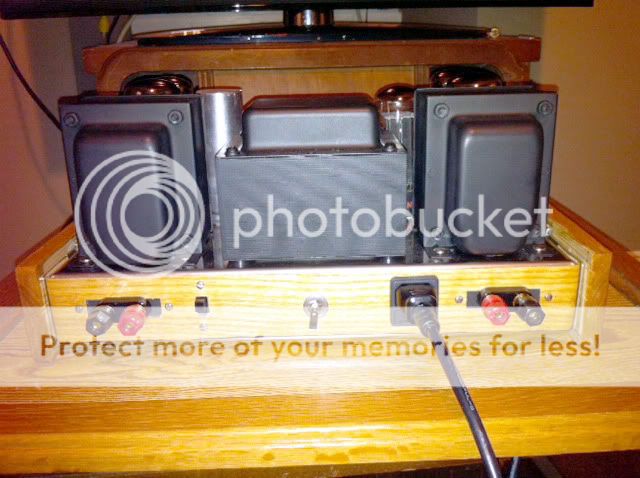
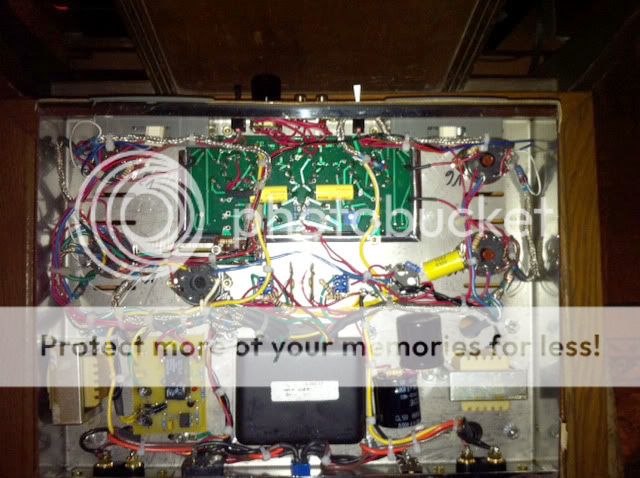
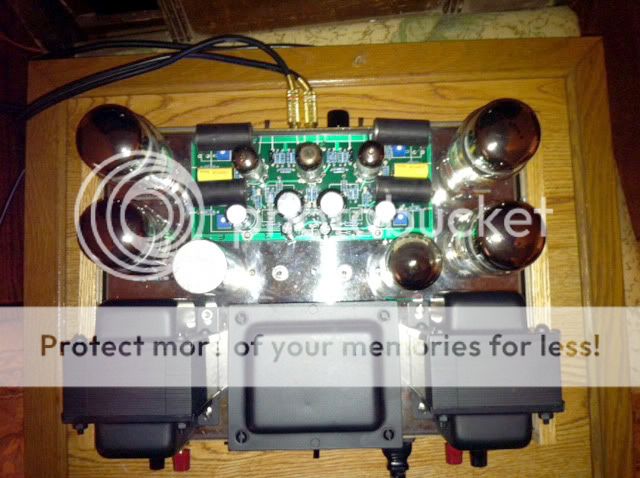
Here's a brief overview of the major mods I performed:
1. Moved VTA Driver board to the top of the chassis. It's mounted on computer motherboard stand-offs.
This made room for the digital bias voltage meters and made some room for the (heat shrink applied) Russian
PIO caps mounted on top of the board.
2. Deleted the front sockets and added 0-10V blue digital meters with a SPDT switch for each channel to
set the bias voltage on both front and rear KT-88's.
3. Installed shielding on most AC and filament twisted pairs. I did this with copper braided shielding
from coax cable. Heat shrink tubing on one end of the wires and a heat shrink solder sleeve (with a small
grounding wire inserted) on the other end.
4. Installed a mini DPDT swith in the rear to switch output impedance from 4 to 8 ohms easily.
5. Installed a modular power socket in the rear with integral fuse holder. Will use any computer power cable now.
6. Applied oak veneer to front and rear panels with oak sides. (first photo taken before sides were put on)